Sunday, October 30, 2011

Week of 10/31/11

GDP

This tutorial will teach you how to create a simple zoom in & zoom out animation with fade-in and fade-out effect in Flash. You can use this zooming effect on any image or text.
STEPS TO FOLLOW
Open a new flash file (Ctrl+N). The New Document window will appear. Select General panel and choose Type: Flash Document. Press OK.
If your timeline window is not open, press (Ctrl+Alt+T). Now you can see a single Layer called "Layer1" in your timeline Window.
Select the first frame. Import a background image onto stage, preferably an image of a street by clicking on File>Import>Import to Stage, or just press (Ctrl+R).
Press F8, to convert this image to a symbol. Name this Symbol "background_gr" and choose graphic behavior. Press OK. Name this Layer "bg". On the 35th frame press F6 to insert a new frame
Select the second layer. Import an image or create a shape of a car using shape tools from the tool box. Press F8, to convert this image to a symbol. Name this Symbol "car1_m" and choose movie clip (F8). Press OK. Name this Layer "car1".
Select the image(car1_m) >right click>edit in place. Now you will come to a new timeline Window called Symbol2
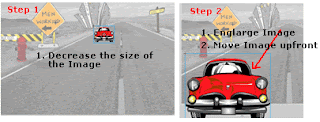
On Frame1 of Symbol2 convert the image to a graphic (car1_gr). Go to the Properties Bar>Color>Alpha>0%. In Frame5 insert a new Key frame (Press F6) and change Alpha to 100% and make the image small. Eg : Pic
Right click in between Frame1 and Frame5 and press motion tween.
Add one more Key Frame in Frame20. In this frame make the Image(car1_gr)bigger and move it out. eg:
On Frame25 insert a new key frame and change Alpha to 0% . Insert motion tween in between frame5-20 and Frame20-25. eg:
Now press (Ctrl+Enter) to view your motion tween.
Continue to do this for your other car images.
Remember to insert only ONE symbol/image in ONE new Layer only.
Congratulations! You have successfully created a Zoom In/Zoom Out animation with Fade In and Fade Out effect!


IGD


This productivity tutorial will show you who to take advantage of Illustrator’s dynamic transform effects to instantly update multiple business cards in any layout. Click link below to see video tutorial of this week's lesson.

http://tv.adobe.com/watch/visual-design-cs5/illustrator-business-cards/#translate-this-episode



Sunday, October 23, 2011

Week of 10/24/11


IGD


1. Demo. Illustrator tools
2. Open new template for :
a. business card
b. letterhead
c. envelope
d. postcard
f. notecard
g. button
3. create a business including address, website, name, slogan and contact info.
4. create a document for each of the items listed in step 2

5. print and display on poster using constrction paper accents


GDP

1. Create storyboard

2. Create and gather images (observing all copyright laws)

3. Paste all images into a new document (ensure the size-in pixels- will handle all the information).

4. Create frames for each scene

5. Add effects and "tween" where needed

6. Set duration for each frame

7. Preview in browser (like Firefox or Safari)

8. Make adjustments

9. Save optimized file

10. Complete a self-reflection checklist


AGD

Work on design in illustrator

Prepare Screens for use:

1. Coat w/ emulsion
2. let dry
3. Print design on plastic or velum.
4. Work on pre-press design

5. Expose Design


Friday, October 14, 2011

Week of 10/17/2011

AGD Advanced Graphic Design


Preparing artwork for you t-shirt is an important step. You don't need to be a professional artist to enter the screen printing field. Many people have started successful businesses even though they could barely draw stick figures. This tutorial will show you how to prepare artwork for a two-color t-shirt. Artwork can be prepared in many different computer programs. Corel Draw and Adobe Photoshop are two popular programs used by screen printers.
A two-color shirt requires two separate screens that must be predpared. The tutorial below will show you how to prepare the artwork needed to burn into each screen.
The Image


The image on the left is the design we will put on the t-shirt. This design has two colors, red and black.
Color #1 - Black


In order to print multiple-colors on t-shirts, your artwork must be separated into the different colors. We need to separate the red and black parts of the image.
The four bulls eyes on the left are actually "registration" marks. These are used to line up your multi-color jobs on the silk screen machine. This will ensure that your images print where they are supposed to when they are printed on the t-shirt.
This image would be printed off on transparency or vellum. We are now finished with this color. It's time for the next color.
Color #2 - Red


The next color to be printed is black. This is done the same way as the first color. The registration marks are also on this image.
This image would also be printed on transparency or vellum. Two separate images make one multi-color image.
The artwork is now ready to be burnt into the screen.


The Finished Product
Our finished t-shirt will look something like the one at the top of this blog.
This is the process that is used for all multi-color prints


Taken from: http://www.silkscreenbiz.com/learning/artwork.htm

GDP Grpahic Design Production


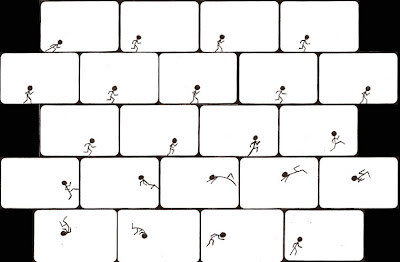
An animated GIF file comprises a number of images or frames to be displayed successively, each described by its own GCE (Graphic Control Extension), preceded by a header whose content by default applies to all the frames. Students will create an animated GIF, going from storyboard concept to finsished product.


IGD Introduction to Graphics and Design


A marketing strategy will help students in defining business goals and develop activities to achieve them. Student designers will develop a marketing plan for their unique products.
Here's How:
Describe your company's unique selling proposition (USP).
Define your target market.
Write down the benefits of your products or services.
Describe how you will position your products or services.
Define your marketing methods. Will you advertise, use Internet marketing, direct marketing, or public relations?

Sunday, October 9, 2011

"Week of" October 10, 2011


In order to be more detailed about what actually happens in Design class, I am using the instructional plans from each lesson plan.

IGD (Introduction to Graphics and Design):

EQ(s): How can I use Illustrator to create a new product for a specific market?

Technology Standard(s): Adobe Systems Software (Illustrator CS or Photo-

shop CS)


Students will learn principles of design and general layout procedures as it relates to the graphics industry. Content will cover electronic systems and software programs used in graphic design, page composition, image conversion, and digital printing. Knowledge and skills in digital design and imaging will be enhanced in a graphic communication production laboratory facility through experiences that simulate the graphic communications industry and school-based and work-based learning opportunities.

ELA10LSV1 The student participates in student-to-teacher, student-to-student, and

group verbal interactions.

ACCT-IGD-17. Students will identify and understand the differences in page

layout, raster based photo manipulation, and vector based graphic software

applications.


Instructional Activities for the week:

1. Marketing Lecture and demo

2. Invent / create product and brainstorm for a new name.

3. Research target market, competition and similar products

4. Create logo and slogan

5. Create product and package

6. Create AD with photo of product.


GDP (Graphics and Design Production):

EQ(s): What is animation? How can I identify different file format types?

Technology Standard(s): Use Adobe Systems software to create an animated gif.

ACCT-IGD-15. Students will identify and produce files utilizing different digital
formats.

Instructional Activities for the week:


1.Create storyboard

2. Create and gather images (observing all copyright laws)

3. Paste all images into a new document (ensure the size-in pixels- will handle all the information).

4. Create frames for each scene

5. Add effects and "tween" where needed

6. Set duration for each frame

7. Preview in browser (like Firefox or Safari)

8. Make adjustments

9. Save optimized file

10. Complete a self-reflection checklist


AGD (Advanced Graphic Design):

EQ(s):

How can I create a screen printed T-shirt Design?

What chemicals are used to screen print?

How can I use multi color registration on my T-shirt design?


Technology Used: Adobe Systems Software (Illustrator CS)

Multi-color screen press technology.

Photo Emulsion technology

Instructional Activities for the week:

Work on design in illustrator

Prepare Screens for use:

1. Re-claim

2. Abrade

3. Degrease

4. Rinse

5. Dry

Coat Screens for use:

1. Coat w/ emulsion
2. let dry
3. Print design on plastic or velum.
4. Work on pre=press design


Prepare Screens for use:

1. Re-claim

2. Abrade

3. Degrease

4. Rinse

5. Dry

Coat Screens for use:

1. Coat w/ emulsion
2. let dry
3. Print design on plastic or velum.
4. Work on pre=press design


Wednesday, October 5, 2011

This week in Graphic Arts (10/4 to 10/7)

Students in ALL Classes are using various types of output processes:
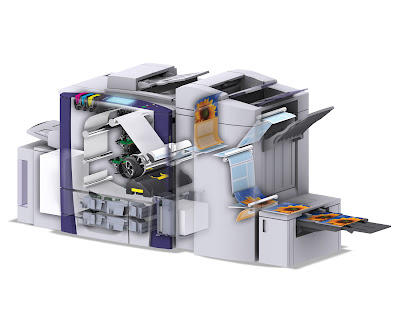
XEROX DIGITAL OFFSET PRINTING
XANTE PLATEMAKER
INK JET PRINTING